
Programming Push Notification Services
one of the drawback of the iphone is running an application in the background when the user switches to another application. So, application will not to receive timely updates at constant state of connectivity.To remedy this limitation, Apple released the Apple Push Notification Service (APNs). The APNs is a service that allows your device to be constantly connected to Apple's push notification server. When you want to send a push notification to an application installed on the users' devices, you (the provider) can contact the APNs so that it can deliver a push message to the particular application installed on the intended device.
In this article, you will learn how to perform the various steps needed to create an iPhone application that uses the APNs.
Generating a Certificate Request
The first step to using the APNs is to generate a certificate request file so that you can use it to request for a development SSL certificate later on.
 1. Launch the Keychain Access application in your Mac OS X.
2. Select Keychain Access'Certificate Assistant'Request a Certificate From a Certificate Authority
(see Figure 1):
 3. Enter the information required and check the Saved to disk option. Click Continue (see Figure 2).
4. Save the certificate request using the suggested name and click Save (see Figure 3):
Click Done in the next screen.

Creating an App ID
Each iPhone applications that uses the APNs must have a unique application ID that uniquely identifies itself. In this step, you will learn how to create an App ID for push notification. 1. Sign in to the iPhone Developer Program at: http://developer.apple.com/iphone/. Click on the iPhone Developer Program Portal on the right of the page (see Figure 4).
 2. You should see the welcome page (see Figure 5).
3. Click on the App IDs tab on the left and then click on the New App ID button (see Figure 6).

4. Enter "PushAppID" for the Description and select Generate New for the Bundle Seed ID. For the Bundle Identifier, enter
net.learn2develop.MyPushApp. Click Submit (see Figure 7).
5. You should now see the App ID that you have created (together with those you have previously created) (see Figure 8).

Configuring an App ID for Push Notifications
Once an App ID is created, you need to configure it for push notifications. 1. To configure an App ID for push notification, you need to click the Configure link displayed to the right of the App ID. You will now see the option (see Figure 9).
Check the Enable for Apple Push Notification service option and click the Configure button displayed to the right of the Development Push SSL Certificate.
2. You will now see the Apple Push Notification service SSL Certificate Assistant screen. Click Continue (see Figure 10).

3. Click the Choose File button to locate the Certificate Request file that you have saved earlier. Click Generate (see Figure 11).


6. The SSL Certificate that you download is named
aps.developer.identity.cer. Double-click on it to install it in the Keychain Access application (see Figure 14). The SSL certificate will be used by your provider application so that it can contact the APNs to send push notifications to your applications.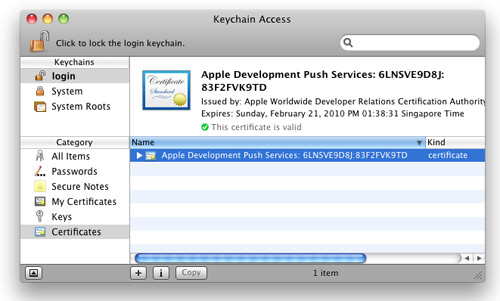
Creating a Provisioning Profile
The next step is to create a provisioning profile so that your application can be installed onto a real device.1. Back in the iPhone Development Program Portal, click on the Provisioning tab and click on the New Profile button (see Figure 15).

MyDevicesProfile as the profile name. Select PushAppID as the App ID. Finally, check all the devices that you want to provision (you can register these devices with the iPhone Developer Program Portal through the Devices tab). Click Submit (see Figure 16).

Provisioning a Device
With the provision profile created, you will now install it onto a real device.1. Connect your iPhone or iPod Touch to your Mac.
2. Drag and drop the downloaded
MyDevicesProfile.mobileprovision file onto the Xcode icon on the Dock. 3. Launch the Organizer application from within Xcode and select the device currently connected to your Mac. You should see the
MyDevicesProfile installed on the device (see Figure 18).
Creating the iPhone Application
1. In Xcode, create a new View-Based Application project and name it as ApplePushNotification.2. Drag and drop a WAV file (shown as
beep.wav in this example) onto the Resources folder in Xcode (see Figure 19).
3. Expand on the Targets item in Xcode and select the ApplePushNotification item. Press Command-I. In the Info window, click the Properties tab (see Figure 20).

In the Identifier textbox, type <
net.learn2develop.MyPushApp.4. Click on the Build tab and type "Code Signing" in the search box. In the Any iPhone OS Device item, select the profile as shown in Figure 21:

ApplePushNotificationAppDelegate.m file, type the following code in bold:#import "ApplePushNotificationAppDelegate.h" #import "ApplePushNotificationViewController.h" @implementation ApplePushNotificationAppDelegate @synthesize window; @synthesize viewController; - (void)applicationDidFinishLaunching:(UIApplication *)application { [window addSubview:viewController.view]; [window makeKeyAndVisible]; NSLog(@"Registering for push notifications..."); [[UIApplication sharedApplication] registerForRemoteNotificationTypes: (UIRemoteNotificationTypeAlert | UIRemoteNotificationTypeBadge | UIRemoteNotificationTypeSound)]; } - (void)application:(UIApplication *)app
didRegisterForRemoteNotificationsWithDeviceToken:(NSData *)deviceToken {

    NSString *str = [NSString
        stringWithFormat:@"Device Token=%@",deviceToken];
    NSLog(str);

}

- (void)application:(UIApplication *)app
didFailToRegisterForRemoteNotificationsWithError:(NSError *)err {

    NSString *str = [NSString stringWithFormat: @"Error: %@", err];
    NSLog(str);

}

- (void)application:(UIApplication *)application
didReceiveRemoteNotification:(NSDictionary *)userInfo {

    for (id key in userInfo) {
        NSLog(@"key: %@, value: %@", key, [userInfo objectForKey:key]);
    }

}

- (void)dealloc {
    [viewController release];
    [window release];
    [super dealloc];
}

@end
6.Press Command-R to test the application on a real device.
PressShift-Command-Rin Xcode to display the Debugger Console window. Observe carefully the device token that is printed (see Figure 22). In the figure below, the token is:38c866dd bb323b39 ffa73487 5e157ee5 a85e0b7c e90d56e9 fe145bcc 6c2c594b.
Record down this device token (you might want to cut and paste it into a text file).


Creating the Push Notification Provider
A Push Notification provider is an application written by the application's developer to send push notifications to the iPhone application through the APNs.Here are the basic steps to send push notifications to your applications via the Apple Push Notification Service (APNs):
1. Communicate with the APNs using the SSL certificate you have created earlier.
2. Construct the payload for the message you want to send.
3. Send the push notification containing the payload to the APNs.
The APNs is a stream TCP socket that your provider can communicate using a SSL secured communication channel. You send the push notification (containing the payload) as a binary stream. Once connected to the APNs, you should maintain the connection and send as many push notifications as you want within the duration of the connection.
Tip: Refrain from opening and closing the connections to the APNs for each push notification that you want to send. Rapid opening and closing of connections to the APNs will be deemed as a Denial-of-Service (DOS) attack and may prevent your provider from sending push notifications to your applications.
The format of a push notification message looks like Figure 24 (figure from Apple's documentation):

The payload is a JSON formatted string (maximum 256 bytes) carrying the information you want to send to your application. An example of a payload looks like this:
{
    "aps": {
        "alert" : "You got a new message!" ,
        "badge" : 5,
        "sound" : "beep.wav"},
     "acme1" : "bar",
     "acme2" : 42
}
To save yourself the trouble in developing a push notification provider from scratch, you can use the PushMeBaby application (for Mac OS X) written by Stefan Hafeneger .1. Open the PushMeBaby application in Xcode.
2.
Right-click on the Resources folder in Xcode and select Add Existing Files…. Select the aps.developer.identity.cer file that you have downloaded earlier (see Figure 25).
3.In the ApplicationDelegate.m file, modify the code as shown in bold below:
- (id)init {
    self = [super init];
    if(self != nil) {
        self.deviceToken =
@"38c866dd bb323b39 ffa73487 5e157ee5 a85e0b7c e90d56e9 fe145bcc 6c2c594b";

        self.payload =
@"{\"aps\":{\"alert\":\"You got a new message!\",\"badge\":5,\"sound\":\"beep.wav\"}
,\"acme1\":\"bar\",\"acme2\":42}";

        self.certificate = [[NSBundle mainBundle]
            pathForResource:@"aps_developer_identity" ofType:@"cer"];
    }
    return self;
}
4.Press Command-R to test the application. You will be
 asked to grant access to the certificate. Click Always Allow (see
Figure 26):

On the iPhone/iPod Touch, ensure that the ApplePushNotification application is not running. To send a message to the device, click the Push button. The server essentially sends the following message to the Apple Push Notification server:
{
    "aps": {
        "alert" : "You got a new message!" ,
        "badge" : 5,
        "sound" : "beep.wav"},
     "acme1" : "bar",
     "acme2" : 42
}
5.If the message is pushed correctly, you should see the notification as shown in Figure 27.

6. If you now debug the ApplePushNotification application by pressing
Command-R and send a push message from the PushMeBaby application, the Debugger Console window will display the following outputs:2009-11-24 21:11:49.182 ApplePushNotification[1461:207] key: acme1, value: bar
2009-11-24 21:11:49.187 ApplePushNotification[1461:207] key: aps, value: {
alert = "You got a new message!";
badge = 5;
sound = "beep.wav";
}
2009-11-24 21:11:49.191 ApplePushNotification[1461:207] key: acme2, value: 42